Panelling is one of the finishing touches that will help determine if you're driving a replica of a classic British sports car, or a rat rod. Personally, I'm kind of a rat rod guy, but there's no reason you can't do better, and here's how.
If you're going for classic looks or maximum performance, you'll want to use aluminum sheet for your panelling. Alloy isn't particularly significant, since these aren't stressed panels, but anything too hard (e.g. 2000, 6000 or 7000 series, particularly if heat treated) will be tough to form. Steel is cheaper and you don't have to polish it, but it's heavier. On the sample car below, I used 26 gauge steel, galvanized and prepainted.both sides. It's the same stuff that steel roofing is made from (24 gauge is available too, if you want the 30 year guarantee instead of the 20 year guarantee, and it'll probably last even longer if you don't put it on top of your house 24/7 for decades), this batch was white outside and brown inside but it's available in a multitude of roof colors, and gray primer as well.
You'd do well to befrend somebody at an air conditioning or sheet metal shop, because jobs that take seconds with a step shear and bench brake will take hours with a hand shear and a...man, I don't know how to do a neat job of this without a brake, but I've seen skilled craftsmen do beautiful work with hand tools; it can be done but don't look to me as an example.
Cockpit side panels
Make two panels 48" wide by 1-1/4" taller than your cockpit (that would be 14-1/4" for a 13" high book frame). Put a row of punch marks across the top, 3/8" from the edge, neatly spaced 1" apart...
Well how the heck do you do that without spending all day at it?
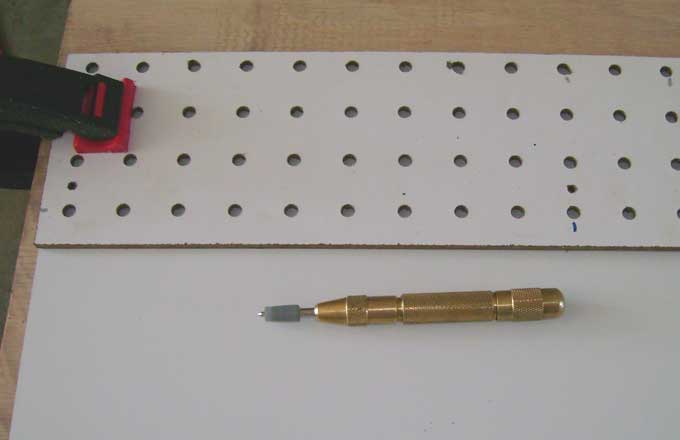
I use a strip of pegboard, and a spring loaded centerpunch with a short piece of 1/4" OD silicon tubing over the end. Clamp the pegboard in place on the panel...

...and punch through the holes. The tubing centers the punch, and it's flexible enough to squish out during the downstroke; it works slick and the tubing is available at RC and hobby shops. I use 1" spacing (figuring that even though these aren't officially stressed panels, they're going to add a bit of rigidity if they're secured with a rivet every inch) but 2" is plenty , or 3"--4" if you're going to be adding pontoons someday...it depends on the look you're after, and serious ratrodders can skip this step if they like, and just eyeball where the rivets go.
Bend the upper edge of the panels at 90 degrees, 3/4" from the edge. If you go a little more than 90 degrees you can tap it down later, if you go less you'll be hitting the sharp edge with your forearm. If you make the lip 1" wide, that's probably the nicest looking, but the sharp edge of the panel will be at the inside edge of the upper frame rail and it'll nick you as you drive. Hey, it's your car; I use 3/4" and a slight overbend.

Present the panel to the chassis and notch the edge as needed for brackets, plus you'll need a little notch where the panel bends at the scuttle. Nibblers work well for these nothches (it's about the only place they work well), hand shears will do the job if you're patient, and for steel panels, you can use a cutoff wheel on an angle grinder. Set the panel in place (don't bend it yet) and clamp it where you want it. On a book frame, a 48" panel will halfway cover the vertical H and M tubes at the front and rear of the cockpit; position the panel with a 1/2" overlap of tube M. Ignore these clecos for the moment, I'll get back to them.

Mark the inside of the panel at the front of tube H, where the chassis bends in. If you want a sharp bend, take the panel back to the sheet metal shop for another ride on the brake. For a gentle bend (not to be confused with the bear of similar name)...

...find a resiliant surface (a lawn, a shag rug), set a suitable cylindrical object (a section of steel tube, a broomstick) atop the bend mark and thump the object with a hammer. It'll take many thumps, at many points along the object, and check your work as you go along because it won't dethump if you overdo it.
Now you can install a few 1/8" clecos to hold the panel in place, use a #30 drill bit or be prepared to wrestle with every rivet you insert during final installation. To mark the vertical rivet line on this H tube at the bend, use the pegboard strip again.
Mark the bottom edge of the panel, where it overhangs the body. Remove the panel, centerpunch the rivit row for the bottom, and either...
1) Take it back to the sheet metal shop for another bend (don't make a special trip, you'll have other bending to do).
2) Hammer the panel over the edge until it's flush with the bottom of the car (this takes lots of taps, and you should back up the part of the panel you don't want to bend with a 2 x 4 or something).
3) If you don't mind the look of a lower row of rivits and/or you're going to put a full body and/or pontoons on your chassis someday, cut the panel at the line.
With options 1 and 2, you can rivit the panel to the bottom of the frame tubes, which is a nice clean way to do it., but depending on what stage of your build you're at when you do your panelling, will call at least for jackstands, and you'll be lying on your back and trying not to swear, because every time you say a bad word, metal filings will fall in your mouth. If you follow option 3, your car will have a long row of exposed rivits and will look like it was built by Captain Nemo. Decisions, decisions.
Front side panels
These panels should be 24" wide by 2" taller than the chassis--actually, they should be more than 24" wide, but I'm cheap and lazy and I'm thinking about making some radiator ducting that will fill the space forward of these panels.
Place the panel flush against the cockpit side panel, with the upper edge 3/4" higher than the chassis.

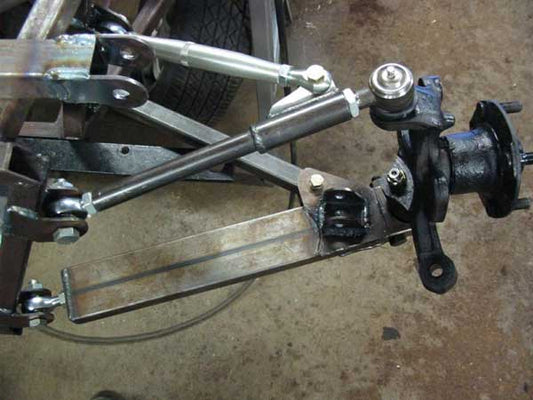
You'll need to make a hole for your header, so break out the nibbler again. In this case I get to do a cutout instead of a hole, since in this case it's a turbo outlet instead of a genuine header. Notch toe top edge if needed for brackets etc. Do what you gotta do.
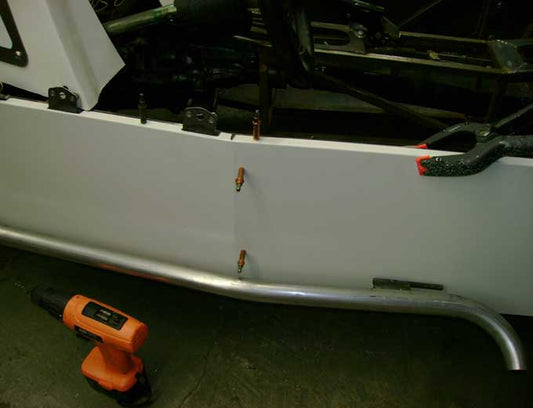
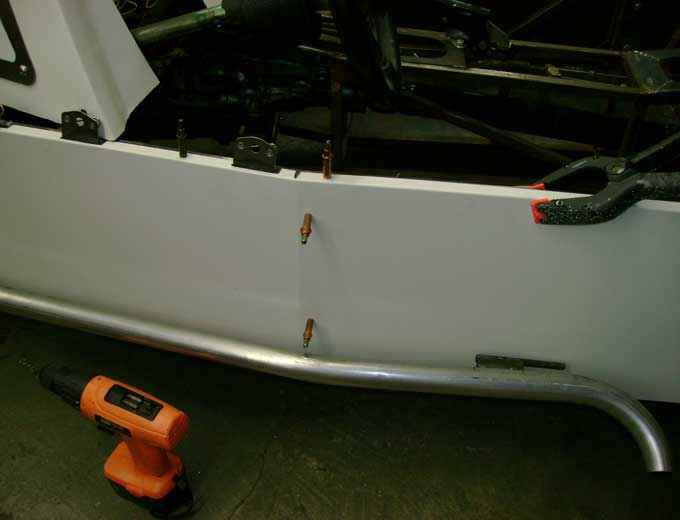
Then mark the inside top of the panel and bend it 90 degrees at the mark. Why can't you do this at the same time you do the upper bends on the cockpit side panels? because if it's a teeny bit out of line you'll get a teeny gap between the two panels when you do your final fitting. Position the panel on the upper frame rail and cleco it in place. Also put a cleco through the H tube where the panels meet, about where you see my finger in the photo above, and 5/16" from the meeting of the panels. About. YMMV.
Then gently bend the panel in until it touches the bottom frame rail, and mark the inside with a felt pen. Bend at that line to 75 degrees, and drill and cleco the bent edge to the bottom of the frame. Ta-dah! Now all you have to do is drill all the rivit holes you marked in all four panels. Soon you can remove the panels (and everything else that's removable) and paint the chassis.
Notes
--On the cockpit sides, there's only 1/2" of lip under the chassis, if you follow the dimensions given above. That's 'cause I don't want the panel edge to overlap the bottom panel of your Locost. But some locosts have different shaped bellypans, and you may have to change the lip to fit. You may also have to do some grinding to avoid welds (or grind the welds).
--If you don't have clecos, aluminum-aluminum blind rivets will do the job; they're easy to undrill. Don't use aluminum-steel (aluminum body, steel mandrel) or drilling them out will be a hassle; the drill bit rides on the broken off steel mandrel and wanders here and there. Guess how I know this?
--My gotta-have-a-bending-brake belief has been proven inaccurate. On http://www.locostusa.com you can find lost of build logs showing how lots of guys did their bending--in brief, it takes patience and a a bunch of little taps, but the end result is a perfect fit.
--If you click here you'll go straight to a LocostUSA discussion of this page you're reading, and some of the participants there have made Locosts far prettier than mine.